Showing posts with label The Father Heart of God. Show all posts

Saturday, 28 February 2015

The Father Heart of God journal

The Father Heart of God Bible Study has finished but before we leave it altogether I thought I would show you the cover I made.

I used a heart stencil and 3 colours of Distress Ink.

I used some alphabet stickers which don't show up too well but I really love the letters so I don't mind.

I measured some ribbon to use as a closer.

I made a hole through the ribbon and the paper and added a brad.  The split pin on the back doesn't show up too omuch and I could put something over it to hide it if it bothers me later!

Here is the ribbon tied so that the zigzag book doesn't fall open.

I made a video of the whole journal.


Thanks for stopping by.
Bernice


Wednesday, 25 February 2015

The Father Heart of God 5

Welcome to my creative response to The Father Heart of God creative Bible Study.  You can find the details of today's session on The Father Heart of God blog.

I showed how I made my backgrounds in this blog post.   I made all the backgrounds at the same time and then cut and scored the papers to make 5 pages for my book.

I decided that I would do every page in the same way throughout the journal and to keep to a limited palette of colours.    I chose one verse from the Bible Study, printed it out and cut it up.  I inked the edges and then glued it to the outside of the folded page.

This is the reverse of the page with some doublesided tape already attached down the edge of the page between the scored line and the edge of the paper.

I drew the wavy lines as before.

Using a black pen I wrote my journaling so that the letters fitted the gaps between the wavy lines.

I went back through with coloured pens putting pattern into some of the letters and circles between the words.  The circles with dots in look a bit like frog spawn but once I'd done the first page I had to stick with it!

Here are pages 4 and 5 together.

On February 28th there will be one last post in this series showing my completed journal.

Thank you for stopping by today.  If you haven't already joined in with this study you can join any time.

Bernice

Monday, 23 February 2015

The Father Heart of God 4

Welcome to my creative response to The Father Heart of God creative Bible Study.  You can find the details of today's session on The Father Heart of God blog.

I showed how I made my backgrounds in this blog post.   I made all the backgrounds at the same time and then cut and scored the papers to make 5 pages for my book.

I decided that I would do every page in the same way throughout the journal and to keep to a limited palette of colours.    I chose one verse from the Bible Study, printed it out and cut it up.  I inked the edges and then glued it to the outside of the folded page.

This is the reverse of the page with some doublesided tape already attached down the edge of the page between the scored line and the edge of the paper.

I drew the wavy lines as before.

Using a black pen I wrote my journaling so that the letters fitted the gaps between the wavy lines.

I went back through with coloured pens putting pattern into some of the letters and circles between the words.

Here are pages 3 and 4 together.

Thank you for stopping by today.  If you haven't already joined in with this study you can join any time.

Bernice


Monday, 16 February 2015

The Father Heart of God 3

Welcome to my creative response to The Father Heart of God creative Bible Study.  You can find the details of today's session on The Father Heart of God blog.

I showed how I made my backgrounds in this blog post.   I made all the backgrounds at the same time and then cut and scored the papers to make 5 pages for my book.

I decided that I would do every page in the same way throughout the journal and to keep to a limited palette of colours.    I chose one verse from the Bible Study, printed it out and cut it up.  I inked the edges and then glued it to the outside of the folded page.

This is the reverse of the page with some doublesided tape already attached down the edge of the page between the scored line and the edge of the paper.

I drew the wavy lines as before. However I changed the green pen for a lighter colour green.

Using a black pen I wrote my journaling so that the letters fitted the gaps between the wavy lines.

I went back through with coloured pens putting pattern into some of the letters and circles between the words.

Here are pages 2 and 3 together.

Thank you for stopping by today.  If you haven't already joined in with this study you can join any time.

Bernice

Monday, 9 February 2015

The Father Heart of God 2

Welcome to my creative response to The Father Heart of God creative Bible Study.  You can find the details of today's session on The Father Heart of God blog.

I showed how I made my backgrounds in this blog post.   I made all the backgrounds at the same time and then cut and scored the papers to make 5 pages for my book.

I decided that I would do every page in the same way throughout the journal and to keep to a limited palette of colours.    I chose one verse from the Bible Study, printed it out and cut it up.  I inked the edges and then glued it to the outside of the folded page.

This is the reverse of the page with some doublesided tape already attached down the edge of the page between the scored line and the edge of the paper.

I drew the wavy lines as before.

Using a black pen I wrote my journaling so that the letters fitted the gaps between the wavy lines.

I went back through with coloured pens putting pattern into some of the letters and circles between the words.

I stuck the journaled page into my zizag book.

Here you can see the page being opened.

Thank you for stopping by today.  If you haven't already joined in with this study you can join any time.

Bernice

Monday, 2 February 2015

The Father Heart of God 1

Welcome to my creative response to The Father Heart of God creative Bible Study.  You can find the details of today's session on The Father Heart of God blog.

I showed how I made my backgrounds in this blog post.   I made all the backgrounds at the same time and then cut and scored the papers to make 5 pages for my book.

I chose one verse from the Bible Study, printed it out and cut it up.  I inked the edges and then glued it to the outside of the folded page.

I forgot to take a photo of the other side of the page before I started to work on it.  I drew some wavy lines.  I actually didn't like the lines at this point but decided I would stick with it.

I used these Faber-Castell PITT artist pen big brush.  Distress Ink Markers would work well too.

Using a black pen I wrote my journaling so that the letters fitted the gaps between the wavy lines.

Then I went back through with coloured pens putting pattern into some of the letters and circles between the words.

I had put double-sided tape down the edge of the page between the scored line and the edge of the paper.   I peeled the backing off and stuck the page into my zigzag book.

To read the journaling you open the page.  If I hadn't had enough room for my journaling I could have used the page of the actual book.

Thank you for stopping by today.  If you haven't already joined in with this study you can join any time.

Bernice


Sunday, 18 January 2015

Getting Ready for a new Bible Study

I am hosting another online creative Bible Study through the month of February.  You can find out about it here: The Father Heart of God.

The Bible Study will be on The Father Heart of God blog and I will be showing my creative response to it on this blog.

For this study I decided I would use a zigzag (accordion fold) booklet I already owned.  I wrote about using one of them here. I found a Strathmore mixed media sketchbook I owned and pulled out 6 pages.  On one piece of the paper I worked out how I was going to use the paper.

The booklet is six inches square so I cut the paper down to 5" wide.  With my score board I made a score line at ½" and 5 ".  By folding only on the 5" score and folding the paper under you get a 5" square.  The ½" score line is so I can glue that strip to the booklet.

I decided to use watercolour paints but these techniques will work just as well with waterbased inks.  I just feel I have more control over the paint.   I used some cheap watercolours I bought in the States.

I spritzed water over two pages and added some watered down colours to the page.  I spritzed with water again and moved the papers around do that the paints ran into each other.

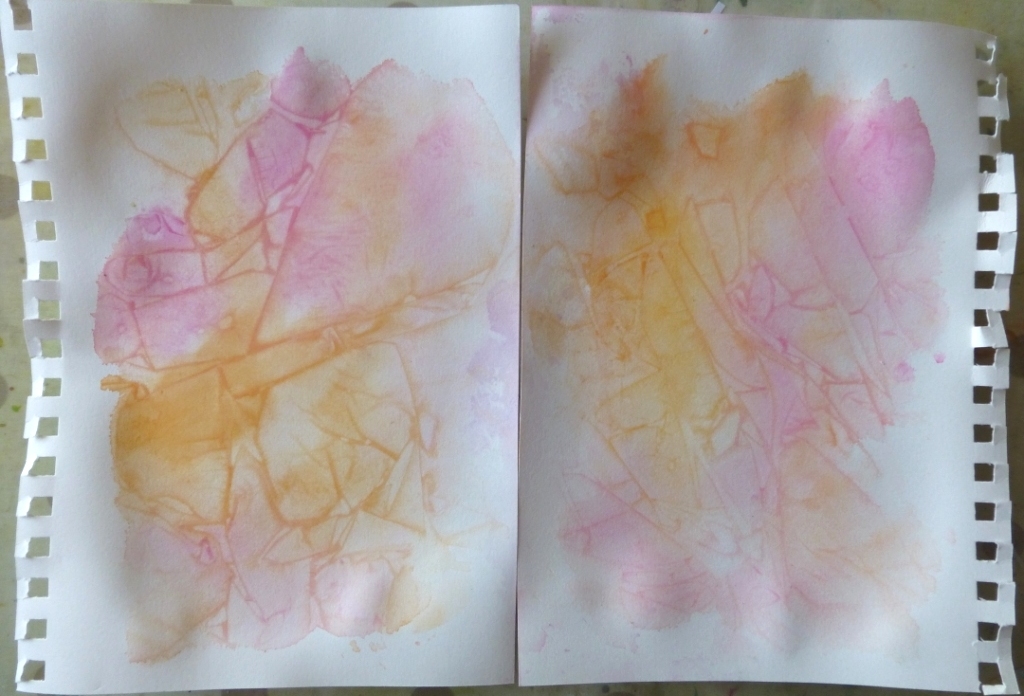
I pressed two different types of bubble wrap onto the paper and left the paint to dry.

I spritzed and added paint in the same way on the next two sheets of paper.

This time I pressed scrunched up cling film on top.

The final page had water and paint added as before.

And then I pressed a scrunched up carrier bag to this page.   I saw this in a Creative Jumpstart video by Catherine Scanlon although she did it with watered down acrylic paint.

Here are the results when all the bubble wrap had dried.

I moved on to the back of the papers making sure the first side was totally dry.  I didn't use the bubble wrap this time.


And here are some of the results.


You may have noticed I worked on the papers without cutting them down to size.  I left them uncut so that it didn't matter whether I went off the edge and also that when I came to add another layer I would know which way up the paper went.

When all the papers were dry I chose one colour of Distress Ink.  I love the combination of turquoise with pink and orange but if you use turquoise and orange in wet paint you get brown.  This way you get the clear paint colours and a clear layer of turquoise.   I selected a few stencils and a piece of punchinello (sequin waste).   I randomly added the stencilled areas over the papers.


Then I scored and folded them.

I sorted out which order they will go into the zigzag booklet.

I used another stencil and 3 colours of Distress Ink on the front cover.


I haven't stuck the painted papers in yet so that I can work on each one for each session of the study and stick the page in using doublesided tape.
I do hope you will join me on this journey to find out more about the Father Heart of God.

Thanks for stopping by.
Bernice