Showing posts with label Leah Higgins. Show all posts

Tuesday, 19 October 2021

Next stage

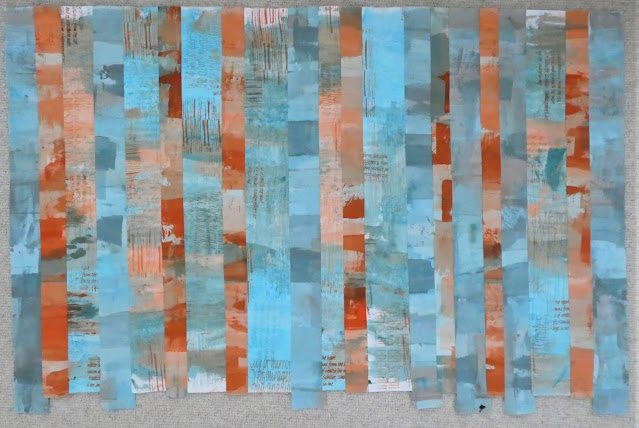
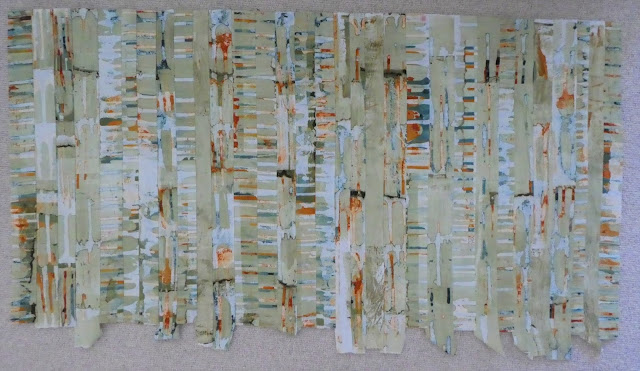
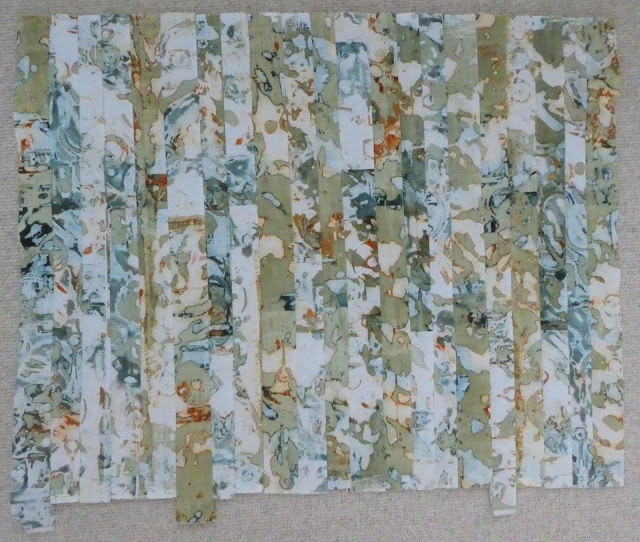
Do  you remember my post 'Lots of Work'?    Well, I've started work!

I machined the strips together.  Of course there are lots of assumptions to be made about this!  As in:

1. Have I accurately cut the strips?
2. Can I sew straight lines with my machine?
3. My ironing and pressing skills are up to par!

I'm fairly sure I'm nowhere near scoring 100% in any of those 3 areas.


These three pieces are all different sizes although the photos show them the same!

Now I have to decide what to do next!  Cut them up some more or leave them as they are.

Watch this space!

Thanks for joining me today.
Bernice

Tuesday, 30 March 2021

Starting a new textile piece

I still have lots of fabric left from the time I was at Leah Higgin's studio for Breakdown Your Palette.  I used some of it for a wall hanging about a walk along the Stratford Canal.  I have wondered what to do with the rest of it and then I spotted this painting by Paul Klee.  It's called Highways and Byways.

I'm obviously going to be drawn to the colours - you know how fond I am of turquoise and orange.

However it gave me an idea for using the fabrics I have.  I didn't have any rust coloured plain fabric that matched my fabrics but Liske at Littleheath Barn Studio kindly sold me some that she had dyed especially for me.  I tore 3 pieces of it to piece with some of the brakdown printed fabric.

 
I had some pieces already stitched together from the previous hanging to give you an idea of what I am planning.

I've sewn those leftover pieces together and added some more.  This will be the central strip.

I'll keep you up to date with how this grows.

In addition I am taking part in a fundraising event that Liske is running called Pieces of Positivity.  After a donation to Cancer Research she sends out a piece of drop cloth - that's the fabric that covers the table in the studio and picks up any paint and stencilling etc as we all work there.  My piece looked like this:

 
I have cut it down to size and bonded it to a backing fabric.   Liske is going to make the pieces we all make into bunting to put around the studio.


It looks enormous in the photo but it's actually only 15x20 cms.  I'm going to handstitch it and then see what else it needs.

Thanks for joining me today
Bernice

Saturday, 13 March 2021

Not a Saturday Story

Instead of a Saturday Story this week I thought I would write about my current textile project.  I am working on a wall hanging based on the fabrics I printed when I was at Leah Higgin's studio in 2019. If you go back to the linked blog post you will see that I have already made two pieces with this fabric plus a child's dress.


I cut some of the fabric up into random shapes and collaged them together using Mistyfuse to 'glue' them to a cotton fabric which in turn was 'glued' to acrylic felt and a backing fabric.

I started machining it using a decorative stitch on my machine.  After a few not very straight lines of that I decided to machine with a zigzag stitch and deliberately make the lines wavy.


Having covered the whole piece with machine stitching I then contemplated how to finish it.  Should I leave it as one whole piece - 28 inches square - or as is my wont, cut it up.  I drew different designs on my computer.

Then I tried the bottom two designs with a photo of the machined piece.


Which would you choose?   Which do you think I chose?


Thanks for joining me today
Bernice

Saturday, 5 September 2020

Works in Progress

How many pieces of work do you have on the go?

I decided I would try to finish some of mine before I started on anything new.  Of course that only lasted until I did Lisa Walton's Fantastic Fusion workshop recently.

However I have finished some.  I made this wall hanging at Leah Higgin's workshop Print, Stitch, Go in November 2019.  It just needed the binding around the edges .

Last week I cut it up and made it into a cover for a large sketchbook.

Last September I started working on Landscapes with Liske at Littleheath Barn.  I started a couple of pieces but stopped working on them at the end of February.  In fact I think the first piece started at a lutradur workshop in 2016, with additions in 2020!

The sewing is finished.  It needs a card mount and a frame.  It looks large here but it's actually only 19x16 centimetres.

The sewing is finished on this one and just needs a press and a piece of wood - preferably driftwood - at the top as the hanger.  This piece is 16x48 centimetres.

The next piece I tackled was this one.  When I stopped working on it, it looked like this.

I had started handstitching it, but when I came back to it I realised the machine stitching I had done around the squares was very poor.  Plus it didn't speak to me at all.

Regular readers will know what I did next!

Yes!  I took it all apart and cut it up.

I wondered whether I could take some of what I learned on Fantastic Fusion and make something with these pieces.  I put Mistyfuse on the back of all the pieces.

I started laying out the pieces and trying them out.  Moving them to different places to see if that worked.

Eventually I decided I needed to fuse them to a separate piece of fabric that was more or less the right size.

I squared the collage up and continued to add bits.

It eventually looked like this.

Now all I have to do is decided how to stitch it.  I'm going to use the machine and hand stitching.  I'll let you know how I get on.

Thanks for joining me today.
Bernice

Saturday, 11 January 2020

Further pages in my workbook

I last shared with you the pages of workbook that related to containers and to patterns using a gondola prow shape.

I continued with this pattern, printing out the patterns I had already composed on the computer.  I cut these up and made various paper samples.  The first one is weaving the paper.

Then I tried cutting up several photos in the same way and then mixing up the pieces.

I made collages with torn strips of the photos.

The next task was to find 4 ways to transfer designs to fabric using two‘low tech’ methods and two 'high tech methods'.

For the high tech methods I first chose to print the patterns onto cotton fabric through my inkjet printer.

For the second method I had a thermofax screen made of the gondola prow design and printed randomly with it using acrylic paint.


The first low tech method I used was to make a lino print.  I cut a negative and positive 'tile' in the lino.


The second method was to use compressed sponge to make a 'stamp' of the shape.


I started working on samples for the next task.  I had been on a Leah Higgins' workshop and used breakdown printing in my Venetian colours.  I cut up some of the fabric to make the samples and used the set patterns on my machine to add texture.


I also tried out paper lamination.  I did a workshop with Christine Chester several years ago but have never done anything with it.

I moved onto painting Lutradur and distressing it with the heat gun.

I hand stitched and/or machine stitched on the samples and put them all into a hand-made book.   I'll show you the results in my next post.

Thank you for joining me today.
Bernice


Tuesday, 10 December 2019

Piecing with Leah

The thing about printing is that you are bound to have fabrics you like and fabrics you don't.  You can always use the fabrics you don't as the backing for a piece of work!

Leah uses what she calls 'bricks' in a lot of her work.  These are rectangles of fabric which she usually uses horizontally.  I love the look of her pieces but don't want my work to be a poor imitation of hers.  I did however want to try out the method.  As much of my Venice work is based on the architecture I thought I would piece these 3"x1" 'bricks vertically.  I spent a long time cutting up fabric.  I spent even longer - nearly 4 hours ironing the bondawebbed pieces to the backing fabric.


It is now ready to machine stitch.  I may handstitch on it too before stretching it on a canvas.

I also tried making log cabin squares.


I also made 3 pieces that were 'half squares'.  Being pedantic they are two-thirds squares!

I didn't always get the hang of the pattern so sometimes the intended middle square wasn't in the middle!  Ho hum!

I was very fortunate that my table was next to the design wall so could pin my squares up as I went along.


Once I had finished all the squares we played with the placing of them.  See if you can spot the difference!


Then I 'auditioned' narrow strips of the solid colour on the pieces before sewing it all together.

Once it was sewn together I bondawebbed the small strips to the fabric.

It's now got a backing fabric and acrylic felt wadding, ready to stitch.

I learned a lot during this 5 day workshop - and not just about screen printing and piecing.  I know that I am a fairly slapdash artist which is probably why I like mixed media.  I like slapping paint down on paper or fabric and taking as little time as possible over it once I have the idea.  But piecing 3"x1" strips is a slow process, as is stitching log cabin squares.  But with Leah's constant support and encouragement I was able to stick with it and achieve the makings of two really good pieces.  I am hoping to continue to apply myself more effort to my work now that I've seen what results I can achieve.

I thoroughly recommend taking course with Leah.  And if you can't make to Urban Studio North you can always buy the book.

Thanks for joining me today.
Bernice